

Wondering how to use polygel nail kit for flawless nails at home? Look no further for expert guidance. Polygel, a hybrid of acrylic and hard gel, offers a user-friendly experience while providing professional-looking results. To achieve salon-quality nails in the comfort of your own home, mastering the application process is key. From preparing your nails to shaping and curing the polygel, each step plays a crucial role in the final outcome. Let’s dive into the detailed steps on how to use polygel nail kit effectively and elevate your nail game effortlessly.

How to Use Polygel Nail Kit: A Step-by-Step Guide for Stunning Nails
Welcome to the world of beautiful nails! If you’ve been dreaming of achieving salon-like nails in the comfort of your own home, then using a polygel nail kit is the perfect solution for you. In this comprehensive guide, we will walk you through the step-by-step process of using a polygel nail kit to create stunning, long-lasting nails that will make heads turn. Let’s dive in!
What is a Polygel Nail Kit?
Before we get started on the application process, let’s first understand what exactly a polygel nail kit is. Polygel is a revolutionary nail enhancement product that combines the best features of both acrylic and gel nails. It is easy to work with, provides a lightweight and flexible feel, and offers incredible durability.
A polygel nail kit typically includes:
- Polygel tubes in various colors
- Slip solution
- Dual-ended nail brush and spatula
- Nail forms or tips
Step 1: Prep Your Nails
Before starting the application process, it’s crucial to prep your nails properly. Begin by removing any existing nail polish and shaping your nails to your desired length and shape. Gently push back your cuticles to create a clean canvas for the polygel application.
Step 1a: Buff and Cleanse
Use a nail buffer to gently roughen the surface of your nails. This will help the polygel adhere better. Once you’ve buffed your nails, cleanse them with a nail cleanser or rubbing alcohol to remove any oils or residues.
Step 2: Apply Nail Forms
If you prefer using nail forms over tips, now is the time to apply them. Nail forms provide a guide for sculpting the perfect nail shape. Simply adhere the forms under the free edge of your nails, ensuring a snug fit to prevent any leakage of the polygel.
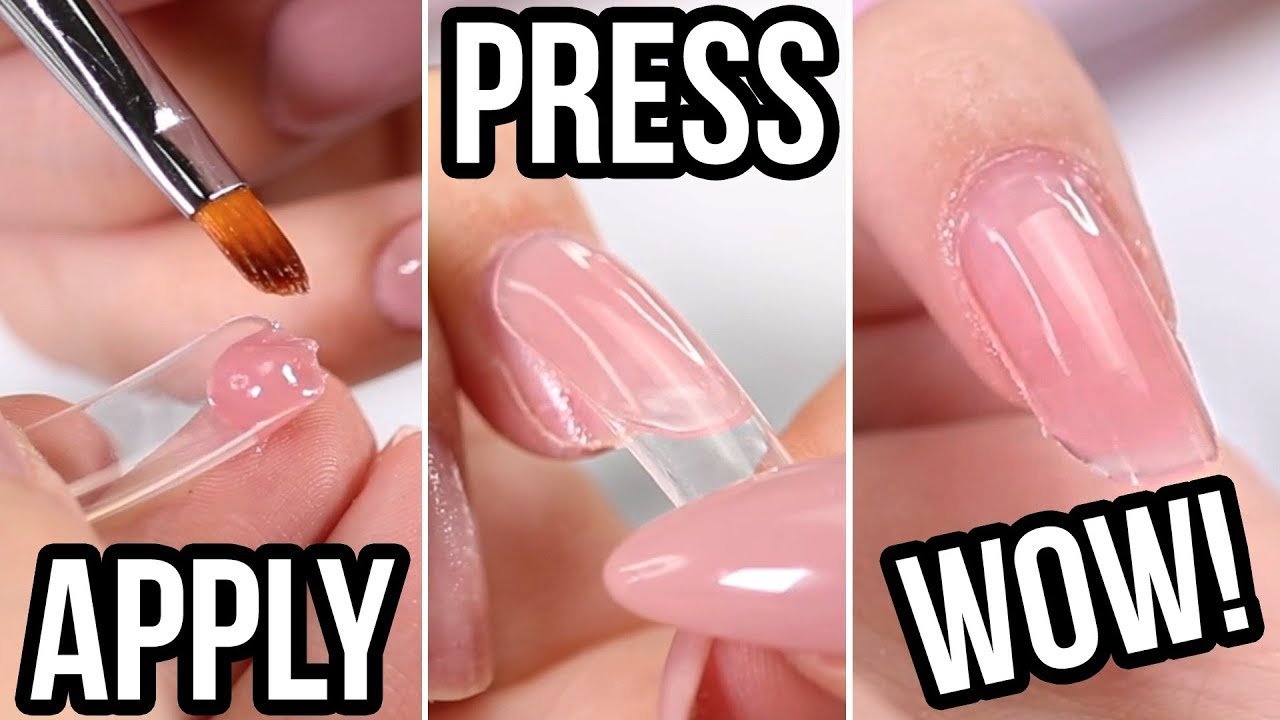
Step 3: Create the Base Layer
Now comes the fun part – applying the polygel! Start by squeezing a small amount of polygel from the tube onto the nail bed. Dip your brush into the slip solution to prevent the polygel from sticking, then gently pat and spread the polygel over your nail, covering the entire surface evenly.
Step 3a: Sculpt Your Nail
Using the brush and slip solution, shape the polygel to your desired thickness and length. Remember to work quickly but carefully to achieve a smooth and even application. Once you’re satisfied with the shape, cure the polygel under a LED or UV lamp according to the manufacturer’s instructions.
Step 4: Finishing Touches
After curing the base layer, it’s time to add some final touches to your nails. You can customize your nails by adding more layers of polygel for additional thickness or by incorporating nail art, glitter, or other embellishments for a unique look.
Step 4a: File and Shape
Once you’ve achieved your desired nail shape and thickness, gently file the edges to smooth out any rough spots and perfect the overall shape. Be mindful not to file too aggressively, as this can weaken the polygel.
Step 5: Seal and Protect
To seal and protect your beautiful polygel nails, apply a top coat over the entire surface. This will add shine, durability, and protection to your manicure, ensuring it lasts for weeks without chipping or lifting.
Step 5a: Cure and Cleanse
After applying the top coat, cure your nails under the LED or UV lamp to set the polygel and seal in the design. Finally, cleanse the nails with a lint-free wipe soaked in alcohol to remove any sticky residue and reveal glossy, salon-quality nails.
Congratulations! You’ve successfully mastered the art of using a polygel nail kit to create stunning nails at home. With a little practice and creativity, you can experiment with different colors, shapes, and designs to achieve endless nail looks that will leave everyone impressed. Say goodbye to expensive salon visits and hello to gorgeous polygel nails that you’ve created yourself!
Now, go ahead and show off your fabulous nails with confidence. Remember, practice makes perfect, so don’t be afraid to try new techniques and have fun expressing your style through your beautiful polygel nails!
Easy PolyGel Nails Using Dual Forms!
Frequently Asked Questions
What is included in a polygel nail kit?
A typical polygel nail kit usually includes polygel tubes (different colors), base coat, top coat, dual-ended nail brush and spatula tool, slip solution, nail file, and instructions manual. These products are essential for creating beautiful polygel nail extensions.
How do I prepare my natural nails for applying polygel?
Start by cleaning your nails with a gentle nail polish remover to ensure they are free from any oils or residue. Then, shape your nails, push back your cuticles, and lightly buff the surface of your nails to create a better bonding surface for the polygel application.
What is the process of applying polygel nail extensions?
First, apply a thin layer of base coat on your natural nails and cure it under a UV/LED lamp. Then, pick a small amount of polygel with the spatula tool, place it on your nail, and use the brush with slip solution to shape and spread the polygel. Cure each layer of polygel under the lamp before applying the next layer. Finally, finish with a top coat for a shiny and durable finish.
Final Thoughts
In conclusion, using a polygel nail kit is a simple and effective way to achieve salon-quality nails at home. Begin by prepping your nails, then apply the polygel using the dual forms or nail tips provided. Cure the polygel under a UV/LED lamp, and finish by shaping and buffing for a flawless look. With practice and patience, mastering how to use a polygel nail kit can lead to beautiful and long-lasting manicures right in the comfort of your own home.